


")


MacBooks are designed to offer customers a seamless and modern experience with their minimalist user interface. Straight out of the box, the MacOS does its job well enough but could use a bit of a personal touch.
You’ll be surprised how by customizing a few settings, you can make the interface feel like your own.
So, whether you’re fed up with your MacBook’s desktop look or want to give it a fresh and personalized touch, today I’d like to share some of my favorite tips and tricks to make the MacOS work better for you.
Related Reads:
- How To Set Goals You Actually Want To Accomplish
- Digital Entrepreneur: How to Become More Present at Work
- 8 Proven Ways to Break Up with Your Bad Habits in Business
- 3 Key Mindset Shifts To Stop Letting Fear And Anxiety Sabotage Your Success
- Losing Motivation? 7 Bullet-Proof Ways To Regain Your Passion And Stay Motivated In Your Business
How To Customize Your Mac: Cool Ways To Do It Quickly
Change Your Wallpaper
One of the first things for MacBook Customization is to change your background wallpaper to your liking. Apple offers several default backgrounds to choose from, but you don’t necessarily need to adhere to them. You can go ahead and create your own. Here’s how.
From your Launchpad, navigate over to System Preferences > Desktop & Screensaver. You can select any by scrolling through several of the available dynamic desktop wallpapers. Apple also provides an option for wallpapers to change throughout the day.
Fortunately, you can also upload a picture of your preference as wallpaper. To do this, head over to the Safari browser and visit unsplash.com. This is a free stock picture website, and they have a wide variety of high-resolution pictures.
Once you land on the website, you’ll find a search bar where you can type in the images you’re looking for. You’ll then be presented with many photos to scroll through and download the ones you like.
However, if you prefer to create your own and personalize it to help your productivity, I recommend using Canva. It is a free-to-use graphic design tool where you can create stunning flyers, collages, social media posts, and wallpapers. I personally use Canva a lot and recommend it to my clients. You can visit canva.com or download their desktop app.
The first simple step is to create an account on Canva to gain access to several of its features. They have a free and paid account option. To begin, launch Canva from your desktop and click the “Create a Design” button. From here, a suggested template list pops up like Whiteboard, Instagram Post, Logo, etc.
You can also go ahead and type in “Desktop Wallpaper” instead. Choose a template of your liking which can be themed around things like “boho,” “nature,” or “cars,” for instance, to give a more aesthetically pleasing look.
Once you have chosen a template, you can edit or add design elements. You have several features on the top left-hand corner of the template. I highly suggest you familiarize yourself with the tools that Canva has to offer. It might seem like a bit of a learning curve, but it’s easier than you think.
Once satisfied with your creation, hover over to the “Share” button at the top right corner and click the download tab. Before that, if you wish to resize or change the quality of the image, you can do that too.
The downloaded pictures will be located in the “Downloads” folder. From there, move them over to the “Pictures” folder for them to be located in your “System Preferences.” Navigate through System Preferences > Desktop & Screensaver, and you will be able to set your new preferred wallpaper.
As for all you solopreneurs out there, you can create a template on Canva to help you achieve your day-to-day tasks and improve productivity.
Icons And Apps
If you want to take customization even further, you can change the apps’ icons with any image.
Imagine having custom icons for each app or folder; sounds cool, right? Let’s look at how to do it.
Let’s get back on Canva, and just like the steps above, create and download images you wish to replace the icons with. If you’d like, a little tip is to replace icons of the apps you use regularly and have them on your desktop.
Once you have downloaded the images you want, go to the app or folder whose icon you want to change, select it, and then right-click, which will give you the context menu.
Tap the “Get Info” button, which gives you the app’s details. You’ll find the default image beside the app’s name in the top left corner of the app info window. All you have to do is drag the preferred image from the downloaded location over the icon you want to replace it with.
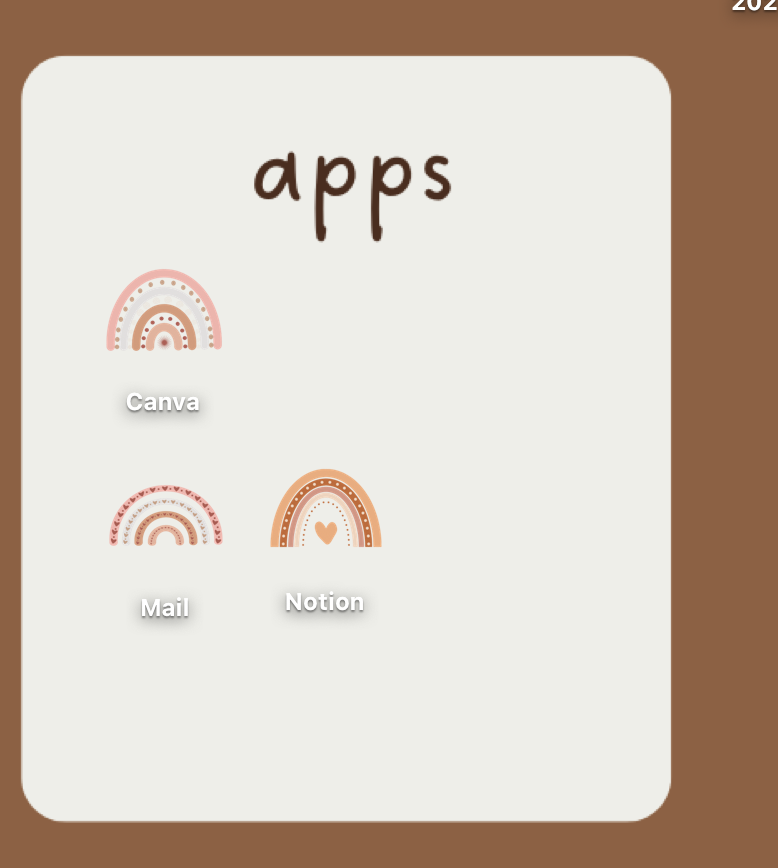
And voila! That’s it. You can repeat the same process to replace as many icons as you want. Now you have a bespoke-looking desktop workspace.
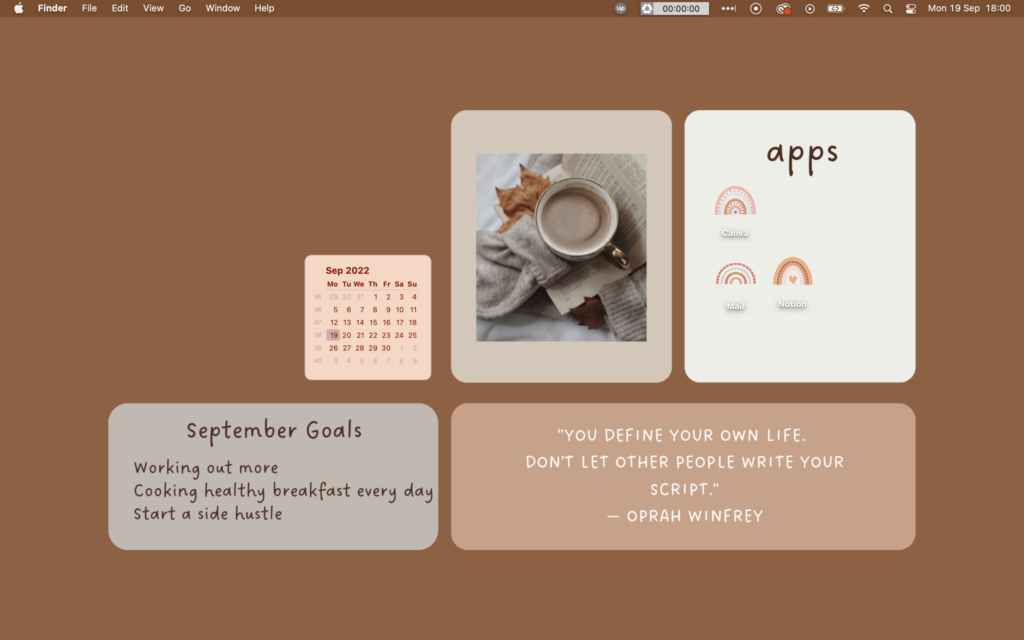
Custom Widgets
If images don’t seem enough, how about widgets?
Adding custom widgets to your Mac’s desktop is a great way to glance at information and updates on things like weather, calendar, and stocks. They also give quick access to apps just a click away.
Simply launch the “App Store” from your Launchpad and search for the type of widgets you want.
Or type in the word “widget,” and you’ll be shown a list of recommended or popular widgets available. What’s cool is that you can further customize the background and text color of the widget as well.
MacOS Settings
In addition to widgets, wallpapers, or icons discussed above, you can alter the look of your MacBook’s general look when it comes to navigating between different apps or tasks.
Simply go to System Preferences > General, and you’ll find the general settings for your MacBook.
You have a plethora of options, from changing the appearance of Menu panels, Accent colors, and sidebar icon sizes to choosing your default browser. I highly recommend playing around with all these options so that the next time you boot your MacBook, it’s not going to look and feel like the same old boring laptop.
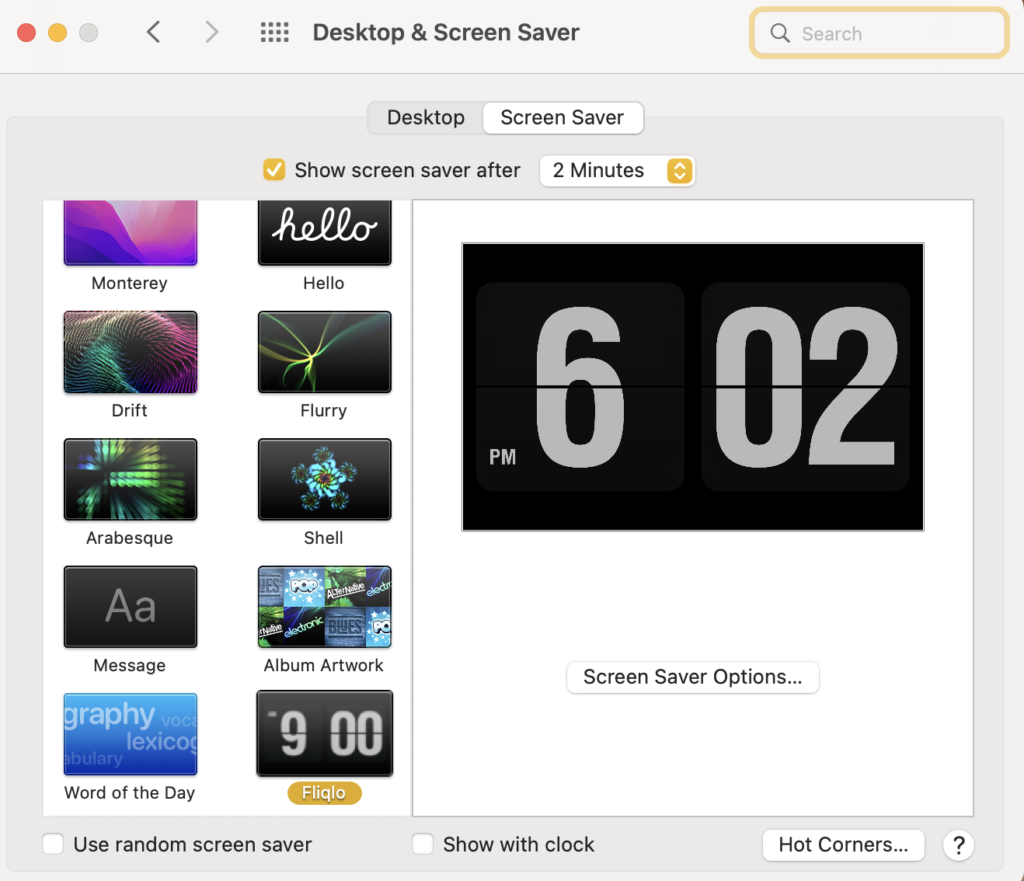
Screen Savers And Hotcorners
When you’re Mac is sitting idle, you probably want a dynamic screensaver running in the background. I use a clock screensaver to run whenever I am away from my laptop.
To have a screensaver of your preference, navigate to System Preferences > Desktop & Screen Saver, and there you’ll find a “Desktop” and “Screen Saver” tab. Click on “Screen Saver”
Apple gives you a variety of screen saver options to choose from. However, if you’re not interested in any of them, you can visit fiqlo.com, which is basically a minimalist clock screen saver.
Download the Mac version, and once done, it will automatically show up under the “Screen Saver” tab I mentioned above.
Furthermore, you can set up a nifty “Hot Corners” feature. When enabled, this tool allows you to perform several actions by moving your cursor to the corners of your display. The feature is also located under “Desktop & Screen Saver.” You can assign actions like hiding your dashboard, the Notification Center, show or hide Launchpad, and so much more!
Once Hot Corners are set up on your Mac, select an action you want from the drop-down menu. So, next time you want to perform a specific action, just point your cursor to any of the corners, and the assigned action will launch.
Internet Browser
It can be challenging to remain focused and not be distracted when working on your desktop. Every time we complete a little task, we may find ourselves browsing the internet, and before we know it, we’ve just spent 2 hours looking at meaningless content.
If so, I highly recommend adding an extension to your internet browser, be it Safari or Google Chrome. Just search for the Momentum extension. Download it from the App Store for either of the browser. Click the install button and wait for it to be added to your browser.
Once added, you will be prompted to enter your name and email address, and you’re done! The way it works is that every time you try to open a new tab on your browser, the Momentum dashboard appears. Right in the middle shows the time and your main focus for the day below it.
You also have shortcuts to use different search engines in the top left corner. In addition, there’s a “Todo” option at the bottom right corner, where you can add your daily to-do lists. Furthermore, the dashboard also displays a quote at the bottom for inspiration.
I hope you enjoyed reading the tips and tricks to customize your MacBook and trying them to help you improve your productivity. There will definitely be more in the future.
Related Reads:
- How To Set Goals You Actually Want To Accomplish
- Digital Entrepreneur: How to Become More Present at Work
- 8 Proven Ways to Break Up with Your Bad Habits in Business
- 3 Key Mindset Shifts To Stop Letting Fear And Anxiety Sabotage Your Success
- Losing Motivation? 7 Bullet-Proof Ways To Regain Your Passion And Stay Motivated In Your Business
So what customization have you done to your MacBook? Let me know in the comments!


Great tips and tricks! I especially love how detailed and precise the steps are!